


Assembly directions for the May bed:
Carefully remove wrapped footboard, headboard and rails from box, place bed platforms, legs and bags of screws (2) to the side. Carefully unwrap and place headboard, footboard and rails on a flat, protected surface, match the rails with the headboard (left & right marked with lettered sticker).
Align biscuits in the rails with the slots in the headboard (image #1); gently tap the back of the headboard / footboard until the rail touches the headboard / footboard. Repeat for remaining corners. Be careful to support the headboard and footboard to prevent tipping.
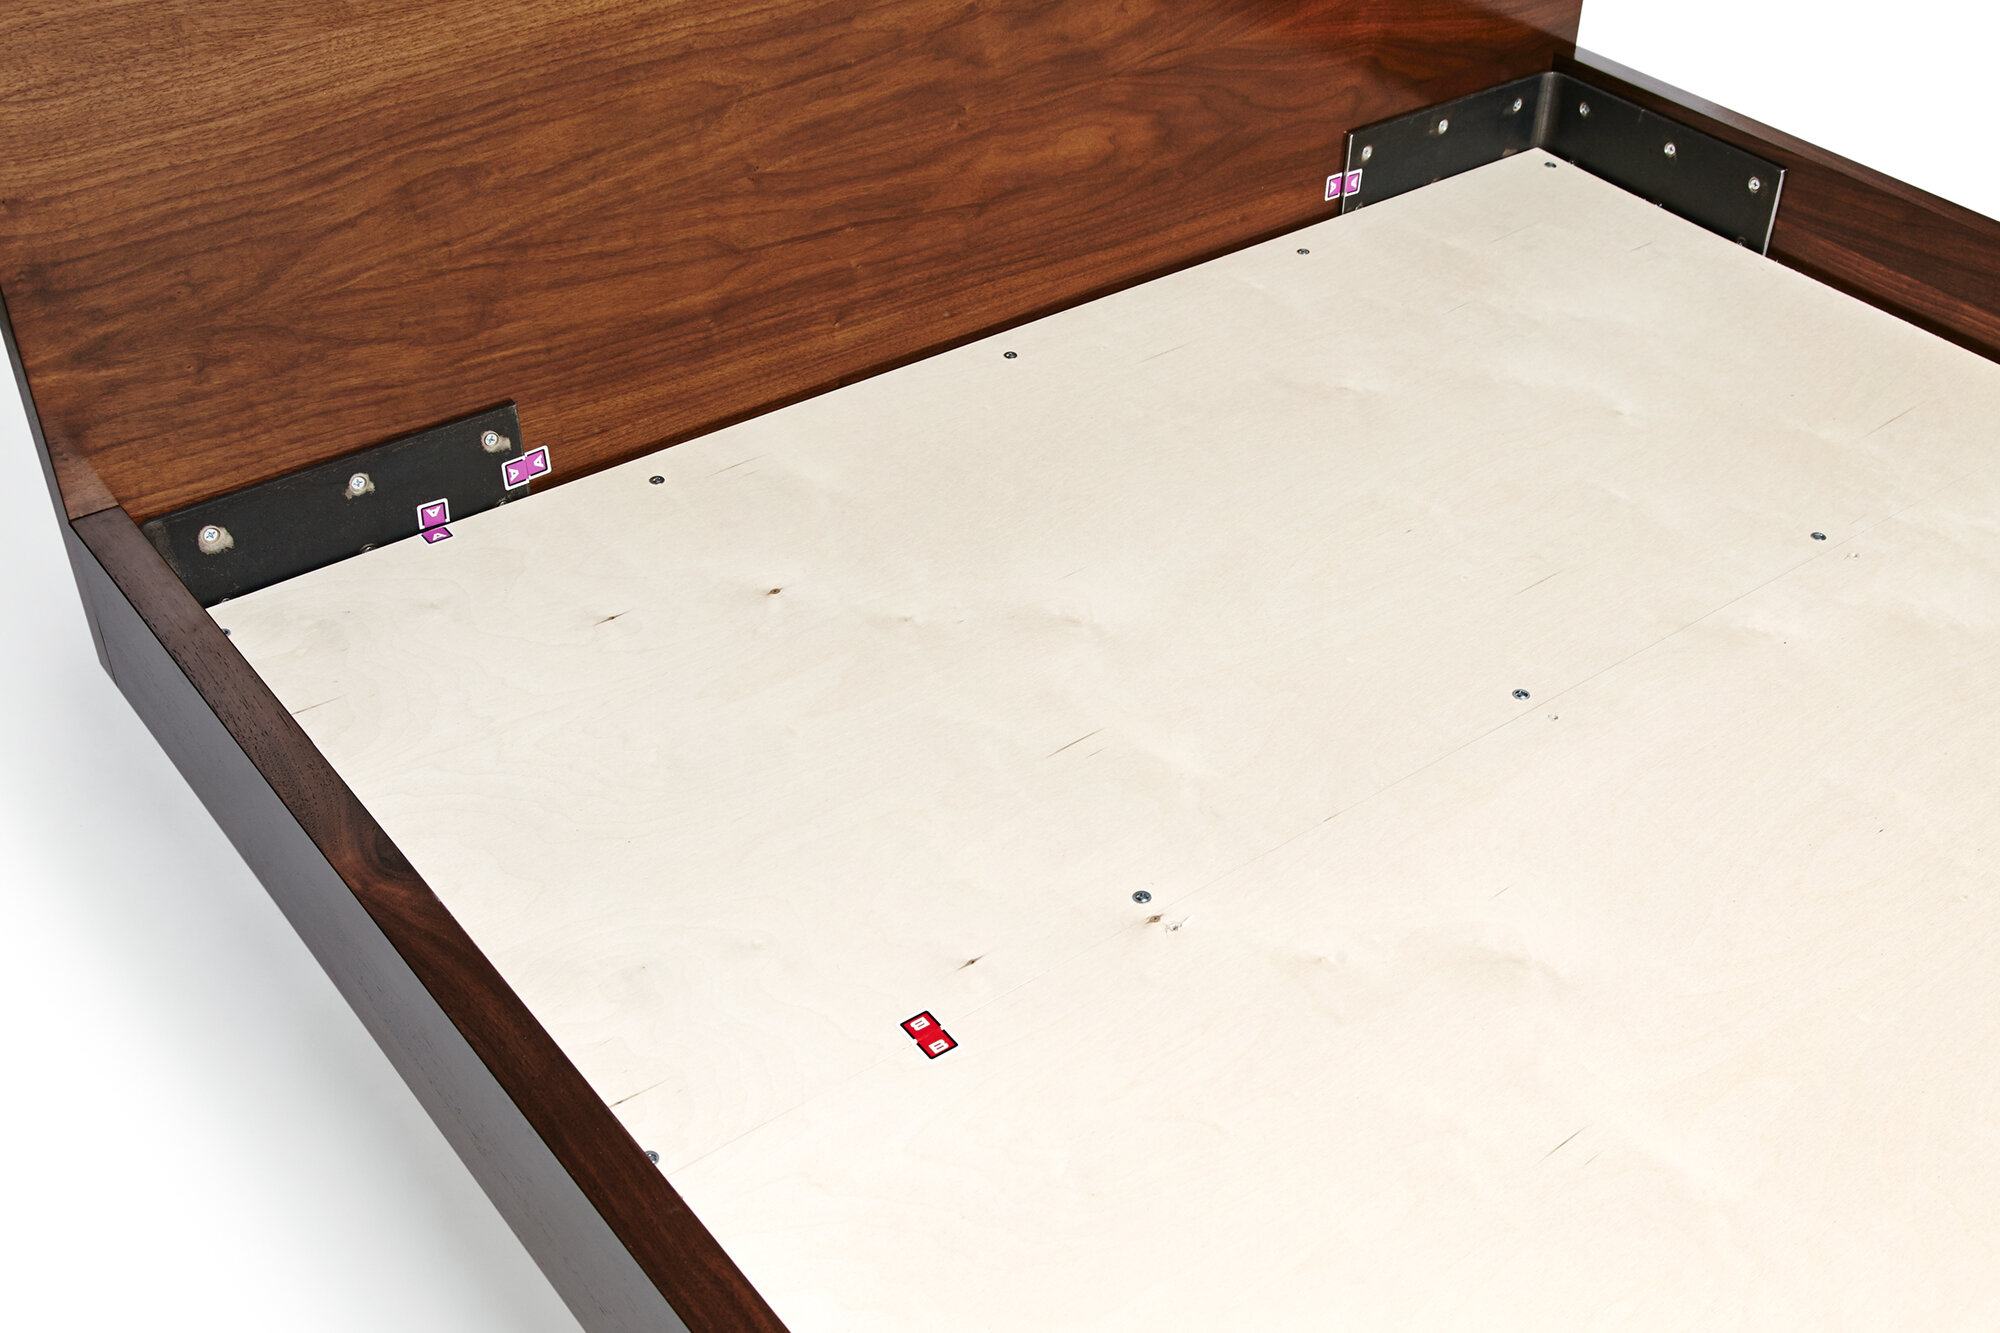
Find plastic bag labeled - rails. The #12 x 1-1/4” wood screws used to install the brackets require a #3 Phillips head, this bit is also included in the bag. Make sure the rail and headboard / footboard are fitted tightly, carefully screw in the metal brackets (image #2). When installing screws, ensure that the screws are tight, but be cautious not to over tighten and therefore strip the screw. Repeat for the remaining corners.
Once the body of the bed is assembled fit legs through the holes in the bottom of the metal brackets (image #5), place washer on top of the bolt, and tighten nut.
Place platforms on bed base and secure with washer head screws (image #6,#7 & #8). These screws require a square drive, which is included in the bag labeled screws for platform. Please note an extra screw were included in both screw bags.